Visual System
Introduction
For the first 2.5 years of operation I was using a
single projector setup with an OPTOMA 16:9 projector.
After visiting a flight simulator installation with a 3 projector
set-up I decided to migrate the visual system of my
flight simulator to
such a solution. From the economical point of view
and considering the additional operation costs, e.g.
for power, it was a questionable idea. But the
improvement of the visual illusion is significant and
compensates the effort in investment, labor, and
operating costs.
Project Planning
Precise planning
and attention to detail are absolutely
crucial to the
success of a multi projector project, especially if you have to
deal with room limitations,
like room height or room width. In my case the flight
simulator room has a height of 2,25m (9,35ft), and
a width of 3.90m
(12.8ft).
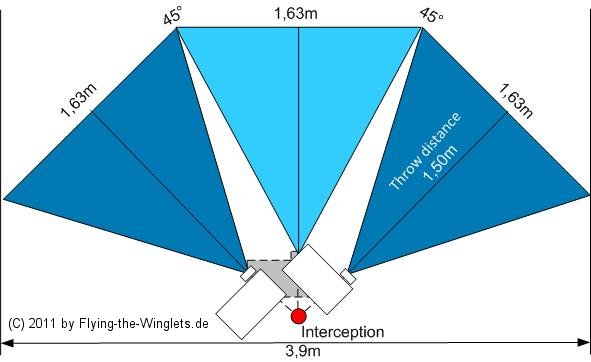
Projector and projection screen layout with
135 degrees FOV
Projectors
After some research I decided on the BQ MX613ST,
belonging to the BenQ business / education product
line. This projector has a very good cost/performance
ratio. The image ratio is 4:3 and the native
resolution is 1024x768 pixels. With a throw distance
of 1,50m (4.9ft) an image width of 1.63m (5.34ft) is
achievable. Perfect fit for my limited room
environment. The variable throw Ratio of 0.9 - 1.08
allows a very precise adjustment of the image size. Perfect fit for my
limited room environment.
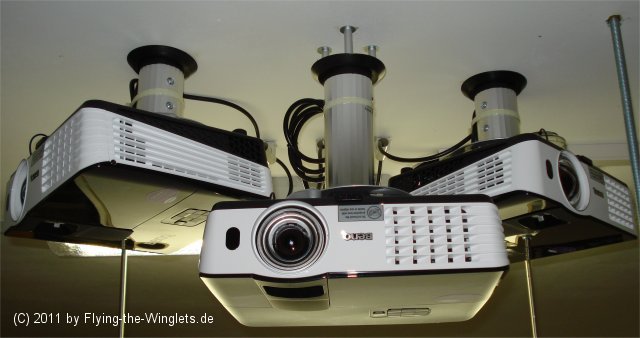
Projector setup and overhead installation with
standard ceiling mounts.
Desktop Expansion
For the desktop expansion and the splitting of
the video signal a Matrox TripleHead2Go Digital is used,
mounted directly on the wall behind the FS computer.
Actually the idea was to place the TH2Go on some
free space in the computer rack, but the DVI cable
which came together with the TH2Go was too short for
this solution. I tried to overcome ´the situation with a
slightly longer cable (1m). But this did not work,
neither with this cable nor with another 1m DVI
cable. I got very strange synchronization errors on
the displayed images. So at the end I had to use the original Matrox DVI cable and build a wall
support for the TH2Go. This enabled me to place the
TH2G close enough to the FS computer.
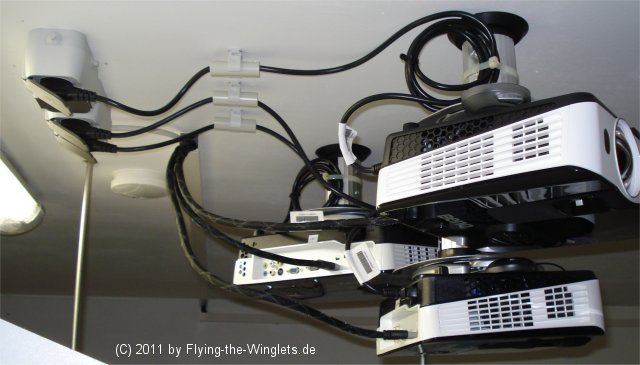
Video and power cabeling. The HDMI cables are of
high quality (HD capable) and 6.5m (21.3ft) long each
Links:
BenQ:
http://www.benq.com/